******************************************

WELCOME TO GOTHIC DIVINE!

THIS BLOG WAS CREATED IN NOVEMBER 2009 WITH THE GOAL OF GATHERING ALL INFORMATION POSSIBLE ABOUT GOTHIC CULTURE.

IT'S NOT A PROPER MAGAZINE SO DON'T TAKE US TOO SERIOUSLY.. :)

SO FAR MORE THAN 300 POSTS ABOUT MUSIC, FASHION, ART, MOVIES AND CURIOSITIES HAVE BEEN WRITTEN!

SUPPORT GOTHIC DIVINE BY COMMENTING THE POSTS, ANSWERING THE POLLS AND SUGGESTING OR SENDING US LINKS OF INTERESTING GOTH-RELATED TOPICS!


GOTHIC DIVINE... YOUR GOTH MAGAZINE!

NEW: Are you a goth artist, an illustrator, a musician, a band, a writer, a model or a photographer? Want to make yourself known among goth community online? To be featured or obtain a free interview in Gothic Divine Magazine it's easy: leave a comment in the guestbook with your name,your job or hobby (model, photographer etc.), your email address where we can contact you and a link to your website.
Incomplete "applications" won't be taken taken in consideration.

RECRUITING NEW COLLABORATORS FOR THIS BLOG!! Click on link below for more information
♥

Followers

Showing posts with label DIY. Show all posts

19 July 2011

Self made accessories anyone?

As you may know I'm a big fan of nearly every kind of handcraft and I love to make accessories on my own. But I'm not the only one in the world who came up with this idea ;) There is a lot great stuff around the internet and I bought beautiful things on eBay already.

Now I want to here from you: Do you also do some DIY-goth stuff? You can show me pics of it, even give me the link to an instruction and I will choose some and post them here in the blog.
Another question is: Do you even want some instructions for DIY stuff (and I don't mean only knitted accessories^^)?

Here I give you some inspiration of some goodies I bought or made myself.

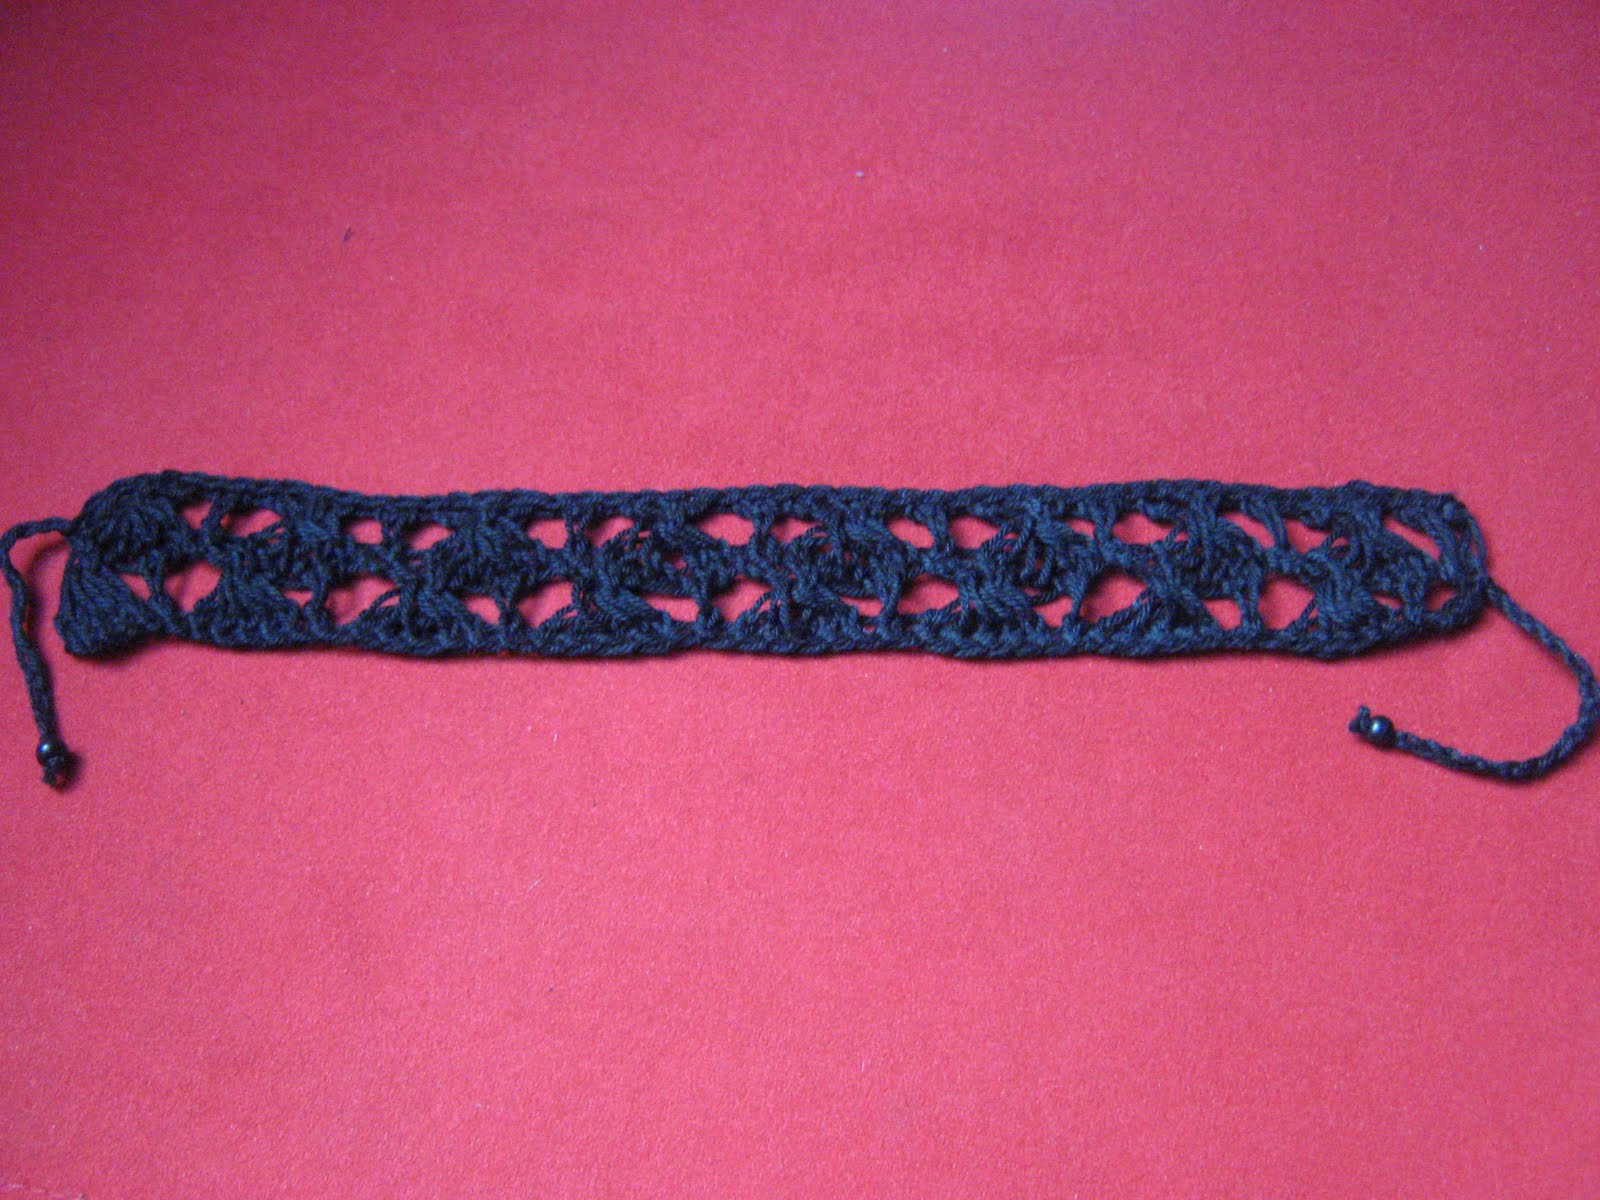
My latest knitting: A black collar and small black gloves

Some really cute Jack Skellington slides I bought on ebay (handmade and glowing in the dark *.*)

Two bracelets with pearls and skulls modelled out of Fimo (the white skulls also glow in the dark, the yellow one has a connection to a mexican celebration...)

Some bracelets I did myself (I love childish stuff^^). Very bad pics of them, I know, but my cam just did not want to show the tiny strawberrys and bunnys on the beads.

This is from a guy I met in the pedestrian zone selling selfmade jewelry.
And the same guy thought me how to do earrings and under his attendance I did this earring. I'm so proud of it^^
Sorry for the messy table...

I would love to see something of your works :)

Greetings

18 July 2011

Hair Dye Process pt.2

Hello again! So this is part 2 of my hair dye posting :)

Let's jump straight to it :)

1) Once the bleach has sufficiently worked (for my red dye, I only need a yellowy colour), it's time to wash it out. I recommend using cold/warmish water, as this protects your hair the best.

2) Dry your hair, so it is only a little damp. Now you need the magic formula... something called 'Toner'. The toner's you can buy from shops are blueish purple in colour (see pic below) - don't panic! This is because they counter-act the yellowness of your bleached hair, allowing for a less ''brassy'' look. It also evens out and softens the colour of the bleached hair. Apply the toner to the bleached parts, you can use your bare hands for this, and leave for an hour or so :) Maybe go grab some lunch :)


3) After an hour, rinse the toner out. You should see an improvement to the bleached parts of your hair! Dry your hair again, so it is only a LITTLE damp.

4) The messy part - Gloves on first! Using a hair dye brush (you can buy for maybe £1 in stores here), apply dye to either side of your parting. Now, part your hair a little further along, and then apply to this new parting. Do this until you have lots of new partings to your hair, all good and pasted in dye.

5) Once all your roots are covered, now you can make sure the rest of your hair is covered. I find that doing it in layers, from the bottom to the top works best for me. If you can't reach the under-layers of your hair, don't worry. Just do what you can on the top, then being very careful, tilt your head over the bath/sink and do the underneath that way.

6) Now you can abandon that brush, and get your gloves messy! Give all the dye a really good rub in, juuuuuust to be sure you've got total coverage. Now you can clip it all up, and go do something for 3 hours or so :)

6.5) 2 cups of tea later, some time on Stardoll, lots of time playing GW and listening to music, hair dye is done!

7) Tip your head back over the bath and be prepared to rinse that dye out for some time! Mine took 15 minutes to run clear, and I only have shoulder length hair. To dry your hair, make sure you use a low heat setting on your hairdryer... and finally, TA-DAAA! Beautiful new hair :)


Again, sorry for the awful photo (not the most photogenic of people), but you get a good idea of the difference between the 'normal' hair with dye, and the bleached hair with dye :) Tomorrow, I will probably add more depth to it by adding small bits of black dye.

Candy x

Hair Dye Process pt.1


Hello!

Sorry it's been a while - I totally underestimated how long my hair would take to fade. Anyhow, I am sat here now with my hair bleach, so I will take you through the first part of the process.

Please note, you do not necessarily need to bleach your hair in order to get great results. This is MY PERSONAL PREFERENCE :)

So, here we go!

1) Allergy test - done, for both bleach and dye, and I haven't grown a third arm, so this is good.

2) Preparing the bathroom and myself. It is important to strip your hair of natural oils as much as possible. This means NO CONDITIONER! I find that (oddly) using baby shampoo for a week beforehand leaves my hair feeling totally ungreasy and almost dry. This means the bleach and the dye will work better. Just before you start make sure you've got everything you will need close to hand! It becomes kinda stressful if you need to run downstairs half way through, to fetch more foil.


3) The hair bleach - Gloves on first! Then mix the bleach up EXACTLY as the instructions say. We don't want to chemically burn our hair off! Also, your hair doesn't even need to go white (which is harmful) in order to achieve the best result.


4) Application of bleach - because I like to have small sections ''highlighted'', it is necessary to raid your parent's supply of kitchen foil. The idea is you put the foil behind the hair, then paste the bleach on, and fold it up - this way, the bleach won't drip anywhere or dry up. Try to work as quickly as possible to avoid potential ''blotchiness''. (Please forgive this horrendous photo! And my grumpy tired owlish eyes, devoid of makeup!).


5) Time to wait! For me, I know how long I need to leave my bleach. It can take around 90 minutes for me. However, it is important to keep checking maybe every 15 minutes just in case.... remember, we don't want to burn our hair off!

So now I am waiting... time for a cup of tea :)

Next post shall be later my dears :)

Candy x

17 June 2011

DIY: Gothic Accesoires - Gloves


Refering to BallerinaDarks post about the goth gloves I'll show you some pulse warmers I made a few weeks ago. Okay, I have to admit they are more sweet lolita style, but imagine them in black ;) (Btw, I haven't found anyone yet who wants them, is anyone interested^^). I simply adore this candy like yarn
However. If you ever learned a little knitting, this won't be this too hard for you.

So ladys, fetch your knitting needles, let's get started!


You need:

  • about 100g knitting yarn for needle size 3,00 (Black and 100% cotton would be ideal)
  • a set of 5 double pointed knitting needles; needle size 3,00
  • some satin ribbon or mercerized cotton knitting yarn about 70 cm long
  • 4 beads 4mm diameter
  • wool needle
Measurements:

swatch (stockinette stitch): 19 stitches / 29 rows= 10cm/10cm
length: 7 cm
breadth: 16 cm/(18cm)
both without ruffles. bigger size in brackets.


Notice: The 16 cm version is for really thin wrists, take the bigger version if you're not sure it'll fit.

How does it work?

We are knitting in the round. Cast on 120 (136) stitches (60 on one needle pair, 60 on the other pair).

1.-4. round: Knit in stockinette stitch.

5. round: *slip one stitch, knit 3 together, pass slipped stitch over* repeat 29 (33) times. At the end of the round you should have 30 (34) stitches on your needles.


6. - 25. round: Knit in stockinette stitch.

26. round: *knit one right, one twisted right, one right, one twisted right stitch out of one stitch*
repeat 29 (33) times. Now you should have again 120 (136) stitches. (That's the only tricky part, because the stitches are very tight now)

27. - 30. round: knit in stockinette stitch

cast off loosely.


Now cut the 70 cm long yarn in the middle and thread one half into your wool needle. Look for the middle of the pulse warmer and pierce the needle from the righ side to the wrong side between two stitches. *After two stitches pierce it to the right side again, after three stitches again to the wrong side.* Repeat until there are two stitches between the beginning and the end of the yarn. Thread on bead on each end and make a square knot on each side. Do the same thing with the other pulse warmer.

Now you are finished! You can tie the ends together after putting pulse warmers on, else you can't push your hand through it.


Remember: This instruction is my literary property. Please don't copy it on other sites, don't use it commercial and ask me please, before you link it.

This was my first DIY post. Tell me your opinion about it. Do you want more of them? Was it clear to you? Should I post other knitting instructions or also something with sewing or crocheting? Tell me, I need feedback ;)

Edit: Okidoke, a little update. Here are some knitting for dummies ;) videos on youtube. I'll post only the links, else the post will be too long. Although they are in german, you can understand it very well by only watching them. (I just didn't find proper english ones and it's hard to find good ones to show. Besides the english knitting method confuses me.)

Casting on on
a set of 5 double pointed knitting needles

Knit out two left stitches out of one (I did a similiar thing, just do it with right stitches instead of left and not two but four times)
Related Posts Plugin for WordPress, Blogger...